The Hyperpessimist

The grandest failure.

Seven Languages, Week 1: Ruby

You should learn a programming language every year, as recommended by The
Pragmatic Programmer. But if one per year is good, how about Seven Languages
in Seven Weeks?

Bruce A. Tate Seven Languages in Seven Weeks: A Pragmatic Guide to Learning Programming Languages

Learning programming languages has been one of my hobbies since quite some time. The thrill you get when learning the basics, when things start to make sense, when you get a compiling program as a reward, when you take your first code and shorten in to one third of its original length is great. The more you know about a certain language, the harder it gets to learn something new and the more esoteric and useless the features you learn get. This is the point where I am with Python: if I were to judge, I’d say it is about as close to an optimal language as it can get. At the same time, it is boring and well explored. Contrast that to Factor where every simple program will take at least a day to write because you need to wrap your head around Factors style. I’m not saying this is better, but it certainly is more exciting.

So during the Black Friday sales I managed to buy Seven Languages in Seven Weeks 40% off and started a study group with some of my friends. Turns out this book is the new rage among my friends.

Week one started easy, with Ruby. We all knew some Ruby or Python and so Ruby wasn’t that much of a change for us. The writing style in the book is somewhat a little too cheerful for my taste, I don’t really need to compare Ruby to Mary Poppins, but I like that the book concentrates on the code and not on installation or stupid basics like how an if statement looks like.

In the Ruby chapter, they introduce metaprogramming. Which is a good idea, for sure, the only problem being that it makes it super complicated and messy. The metaprogramming examples do not make anything easier and my question why I should prefer mixins over (multiple) inheritance were not answered.

Overall, our group didn’t like Ruby that much. Some didn’t like it because it was dynamically typed, some because it was too similar to Python. A specific problem we ran into were the quite useless syntax error messages of Ruby 1.9.3. I dont’t think dumping internal token names to the user of the language is a good idea. Usually the errors were missing commas, so if the interpreter could check some common classes of errors, that’d be awesome.

Next week is Io and I look quite forward to it. I haven’t yet used it but from the introduction I could happen to like it.

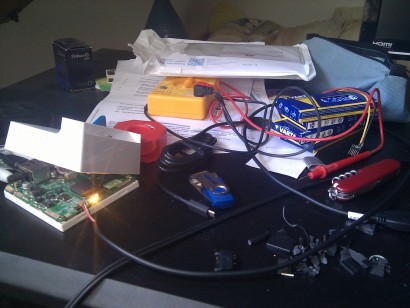
Reviving the ThinkPad T41 Brick

So, I seem to be on a roll, since the last “reviving” post, I checked out my stacks of useless electronics and came upon one of my old ThinkPads, namely a ThinkPad T41 that I bought for my granddad and that broke some time ago (he switched to a crappy consumer laptop with Windows 7, if I had a say he’d use a tablet). This device is from 2004 or 2005 and has a 1024x768 resulution (aka utter garbage) screen, but it is kinda light and I equipped it with an SSD so it is rather fast. To put it into context, it was bought refurbished.

I thought that might be a cool idea for a device to take with me - to university, in a backback, whatever, because there was hardly any harm if it broke. Some cheap device when my smartphone does not cut it. I don’t really like carrying my >1000€ ThinkPad T420 with me, for fear of breaking it.

Now, I tried to boot it, and it doesn’t. It boots right into a 1802 error which those of you that have ThinkPads might know: they have a whitelist of WiFi cards that they work with and it you plug in one that Lenovo does not want you to use, the device doesn’t boot. Now I was kinda surprised, since the laptop used to work previously. So I opened the device according to the hardware maintenance manual, which is basically: unscrew keyboard, unscrew palmrest, done. Turns out, there was a Broadcom card inside. Frankly, I was super-surprised, since how the heck did it ever work. And why did it stop now?

If you follow the link above, you’ll notice that it is possible to hack the BIOS so it accepts any card. This apparently stopped working so it prevented booting. When I unplugged the card it was working fine, but a laptop without WiFi is a useless brick nowadays. The choice was whether to hack the BIOS again or get another WiFi card. As it happens, I avoid Broadcom as much as possible, so I decided to get the IBM a/b/g since it is the only “original” card that supports IEEE 802.11g networks aka your network is not slow as molasses. eBay to the rescue and two weeks later the card arrived from the USA.

Now with the shiny new card (it was actually a brand new original IBM card from 2005) I boot and I get… 1802 again. My first thought was I got tricked. Some googling revealed, that maybe a BIOS update would add my new card to the whitelist. To make things short, for the T41 I needed the non-diskette BIOS for the T41 mentioned on the ThinkWiki and extracted the files using cabextract as mentioned again, on the ThinkWiki then I created the ISO files and burned each BIOS and ECP on a CD-RW. Turns out, I can’t boot from those because my BIOS battery is empty and if the battery is empty, it is not possible to boot.

This explains why the laptop did not boot with the Broadcom card. Someone hacked the BIOS to boot with it and then the battery died and the hack was erased from the memory, so it didn’t work anymore. This realization made me feel like Sherlock Holmes. 5€ later I bought a replacement CR2032 battery from eBay. You can get these cheaper, but I bought one with the proper wrapping and cables, so I didn’t have to bother with it.

Eventually it arrived and I went about updating the BIOS: The instructions are a bit chaotic in the ThinkWiki, because they recommend updating first ECP and then BIOS for compatibility reasons if not specified otherwise on the Lenovo web site. In the instructions for my T41 BIOS 3.23 it is mentioned otherwise. I was unsure because I had BIOS 3.05a and ECP 3.01a and they each have their compatibility list so I thought about updating stepwise but that would take forever so I just went ahead and updated first BIOS 3.23 and then ECP 3.04. It worked without problems and suddenly, the 1802 error went away. Win!

Afterwards, I booted the Fedora LXDE Spin, version 17 and installed that. Why Fedora? Because it boots wickedly fast with systemd and SSD and has rather recent software.

Future experiments: buy better display, hollow out the battery for a lighter device, kill and hollow out a CD drive to close the Ultrabay Slim bay.

Continuous Integration With Travis-CI

Many of you might know it, but I finally found the motivation to try continuous integration. Maybe you have seen the icons lately on projects on GitHub:

Build Status

This icon is generated by Travis CI, a hosted solution for continuous integration for open source projects on GitHub. What is continous integration? It is basically a way of checking out the software, running the test suite and seeing whether it passes or not and if it doesn’t where it fails. So basically what you would do on your PC anyway. The advantage is that the CI system can set up your project in different configurations, so think multiple Python versions, multiple Node.js versions and in theory multiple operating systems. The latter is not quite true for Travis-CI because it only runs Linux but oh well.

Getting started is actually surprisingly easy, since all you need is a GitHub account. I clicked the Log-in link on the Travis-CI site and after a few moments GitHub asked me whether I want to let Travis CI access a few things on my profile and that is it, a new user was created in Travis CI without me typing any passwords or whatnot. Fancy. After that I set up a hook in GitHub to notify Travis of new commits in my GitHub repo.

Next step was adding a .travis.yml to my repo, because Travis assumes you are a Ruby project when building. Travis supports a number of environments, so I just chose Node.js (I deny calling Node.js a language). Next push into my repo, and Travis CI checked it out, ran npm test and decided by the return code whether the build succeeded or failed.

The result looks like this. When someone (aka me) breaks the build, Travis sends an email that the build is broken, and when someone fixes the build I get a mail that it got fixed (prevents spamming me with mails that nothing changed). Overall, a quite elegant solution and completely free for FOSS projects.

Drawbacks: sometimes Travis-CI chockes for no reason, like the Git clone hangs forever and nothing is happening. In my limited experience the build got restarted after a time, but I could imagine, sometimes you get broken builds because of the failure of the CI system. Also, due to being language agnostic, Travis does not really provide a way to show how many tests succeeded or failed in one look. You can look at the console output, but if you have even one failing test, the build status will be “broken”, without any more helpful messages.

Maybe we’ll get a better solution in the future, but for now I am quite impressed.

Costs of the Raspberry Pi

If you visit the Raspberry Pi web site you see the tagline “An ARM GNU/Linux box for $25. Take a byte!” which is, when it comes down to it, rather untrue.

Let’s check the numbers with my recent Raspberry Pi order from RS (the previous order from element14 was not much of a difference), a Raspberry Pi Model B, alas the only one available at the moment:

The device itself cost 27.40€ (which itself is about $35 and consistent with the pricing on the web site). Now wait, there is shipping, which amounts to 6.28€ from the UK to Germany. Wait, that was not all! To my surprise the base price was without VAT, so add another 5.48€ to it. So we are at 39.16€ ($50 dollars).

And what we got is a brick, because it does nothing at the moment and can’t even boot. So we need an SD card, I paid 7.68€ for a good 8GB SD card. You can go a bit cheaper but you are around the 5€ mark anyway. So now it boots… actually it doesn’t, since it needs a power supply. You could use your USB smartphone charger but then you’d have to chose between using the RPi and charging the phone. Not really an option. So you need a charger which is about 6€. I did it better and bought a powered hub where I can plug the Raspberry Pi in, too. 7 port powered USB hub was 15.47€ and if you want to plug in the Pi you need to get a microUSB cable, 1.59€.

Now the Raspberry Pi could boot… you just don’t see anything because it needs either a video cable or an HDMI cable. With previous bad experence with cheapo HDMI cables, I went with a solid mid-range Amazon basics cable, 5.99€.

As you got all these things, you realize that the Raspberry Pi is just a board lacking a case. I ordered a plastic case for 9.99€ off ebay, which is again, a mid-range price for cases.

But depending on your situation, you might still need something like a screen, a keyboard or a mouse. I had all of these available, so no problem, but consider these too.

My overall sum is 79.88€ ($102) which is four times as much as the Raspberry Pi tagline says. I understand the Rasperry Pi foundation that the low price was an important reason for wide attention, but now that they have the attention, they should be a bit more honest about the price.

Notes on the PyCon DE 2012

So, yesterday the actual PyCon DE 2012 ended and today the barcamp and sprints start. 2012 marked my first PyCon and I submitted a talk too, which got accepted and went about okay though I’m not a great speaker by any means. But generally, I’ve been quite happy with how the conference turned out.

I didn’t learn that much from the talks and there’s only a couple of talks I would recommend, but meeting the people and putting faces to nicknames is interesting anyway. I had the luck of sharing a hotel room with three fellow pythoneers. Also, travelling to Leipzig was quite enjoyable, by means of Mitfahrgelegenheim because I despise travelling by train in Germany. The organisation of the conference was top-notch, the venue was aptly chosen and everything just worked.

At this point I should point out that we had a meetup of the Python Forum to which we got snacks, beer and even a cake with candles for our tenth anniversary which was a really nice touch. Many thanks to Christian Kreutzer for organizing this, I was impressed.

Am I going for next year’s PyCon DE? Well, we’ll see. The main problem is that I hardly use Python anymore, I just happen to like the community.

First Steps in ARM Assembly

As I believe the Raspberry Pi is quite a nice device for developing (basically a programming console, like game consoles) I thought it might be a nice idea to do some low-level programming on that thing. It is after all a rather slow device…

There is some tutorial specifically for the Raspberry Pi already, but this is very basic and the code that he writes is rather complicated with complex instructions like stmfd and ldmfd. I went a slightly easier route with this tutorial.

The ARM architecture is kind-of a strange beast, because it can be low-level programmed in various ways. The first chips used 32 Bit instructions that are called “ARM” today. Some time later they added a 16 Bit instruction set called “Thumb”. Some years later, “Thumb2” came along, as a revised version of the original Thumb instruction set. The ARM1176 that is built into the Raspberry Pi supports ARM and Thumb instruction sets (some reviews state also Thumb2 which is not true – ARM1156 supports Thumb2 but that does not mean that ARM1176 does too). In the Raspberry Pi world, nobody seems to use Thumb1, therefore I’ll focus on the classical ARM instructions.

I’m assuming that you do have some experience with programming, so you more or less know how a C program looks like. In my experience it is usually quite easy to take a C program and go from there to the assembly program.

Without further ado, let’s start with one of the easiest programs ever:

So, if we take this and translate it roughly into ARM assembler:

To get an executable file, it is easiest to just run gcc on it:

1
2
$ gcc hello.c -o hello-c
$ gcc hello.S -o hello-asm

Run them and you’ll see they work just file and display Hello World just as expected. Let’s look at the binaries a bit closer to see what we actually did:

1
2
3
4
5
6
7
$ file hello-asm
hello-asm: ELF 32-bit LSB executable, ARM, version 1 (SYSV), dynamically linked (uses shared libs), for GNU/Linux 2.6.26, not stripped
$ ldd hello-asm
        /usr/lib/arm-linux-gnueabihf/libcofi_rpi.so (0x401e5000)
        libc.so.6 => /lib/arm-linux-gnueabihf/libc.so.6 (0x401ee000)
        /lib/ld-linux-armhf.so.3 (0x4004c000)
$ objdump -d hello-asm

The file command tells us that we created an ARM executable file with 32 bit that uses shared libs. Which shared libraries? ldd tells us that it is libc, because of printf(). In case you wonder what libcofi_rpi is – an optimized implementation of memcpy()/memset() for the Raspberry Pi CPU. You don’t need to worry about this one.

The last command disassembles the binary again, so you can check what GCC did exactly. If you check the disassembly of the main label, you’ll see the push and pop instructions in the disassembly, and in the message label you can find the “Hello World!\n” string which is rather interesting if you’re new to ARM:

1
2
3
4
5
6
000083bc <message>:
    83bc:       6c6c6548        .word   0x6c6c6548
    83c0:       6f77206f        .word   0x6f77206f
    83c4:       21646c72        .word   0x21646c72
    83c8:       0000000a        .word   0x0000000a
    83cc:       000083bc        .word   0x000083bc

The first column is the address, the second column is the value at that address and the other colums are the decoded values. In the case of our string the address 83bc (as it is hexadecimal 0x83bc means the same thing) contains the value 6c6c6548 (again, in hex). If you know ASCII, you’ll notice that the ASCII representation of ‘H’ is the number 72 or in hex 0x48. If we continue, ‘e’ is 0x65 and ‘l’ is 0x6c. So the address 0x83bc contains the string “lloH”. Now, why is it reverse? Because the ARM architecture used in the Raspberry Pi is little-endian, which means that the representation is always reversed. By the way, this is also valid for x86 machines, they also use a little-endian representation. For more information, Wikipedia delivers.

And that concludes our short trip into ARM assembly. Stay tuned in case I’ll write some more about it.

Reviving the DockStar Brick

Some years ago, there was a big craze when someone discovered that the Seagate DockStar could be hacked and flashed with your own software. The point was, it was a 25€ device with a quite decent ARM chip, Gigabit Ethernet and a load of USB ports. Overall, a good deal cheaper than the Raspberry Pi which cost me 42€ without power supply and case and does not seem to be any faster. So back in the day, I installed Linux on it and it was shelved.

Some week ago, I decided I could create an appliance out of it for streaming music at home. So, I wanted to update the software, updated the bootloader and… bricked the device (linking to Wikipedia because “brick” is such adorable slang with such a nice article). To unbrick it, I had to get access to the bootloader by building a special serial cable, for which I needed a CA-42 cable which is actually a cable to connect your Nokia cellphone to the PC. If you speak german, go ahead and click the link to Amazon, it has hilarious reviews that go like this: “no idea whether works with an actual cellphone, but it works fine for connecting my bricked device” which is the exact usecase that I have.

So after all, I cut off the Nokia connector and got three wires inside: red/white/black which correspond to GND = black, TX = white, RX = red. I opened the case and connected them with much fiddling to the appropriate pins on the DockStar board and connected GNU screen to /dev/ttyUSB0 with 115200 baud (previously I tested different terminals, screen is the only one I trust), lo and behold it boots up and refuses to load the kernel that I installed in the flash. So I copied Arch Linux ARM on a USB thunbdrive, booted from that and installed a newer rescue system (Rescue V2) and then the unofficial V2.8.1, so I don’t lock myself out again. On the USB thumbdrive I installed Debian Weezy as main system.

After that was working, I plugged in a USB soundcard (don’t get the LogiLink USB soundcard it’s utter shit, I switched to another one) and installed PulseAudio:

1
aptitude install pulseaudio

After you do that, you need to edit /etc/defaults/pulseaudio:

1
PULSEAUDIO_SYSTEM_START=1

Which starts PulseAudio in a mode in system mode. In /etc/pulse/daemon.pa I added

1
load-module module-native-protocol-tcp auth-anonymous=1

Which allows anyone to stream music to it, without authentication. To actually get music playing you need a different computer and specify the address of the PulseAudio server as environment variable (somehow most tutorials don’t mention it):

1
PULSE_SERVER=ip quodlibet

which starts my media player outputting to the DockStar. Overall, tremendously cool but it stutters if I’m on WiFi because Pulse streams the music in uncompressed PCM format. PulseAudio, please, oh please fix ticket #366.

What’s yet left? Putting the DockStar in the living room and showing off!

Some Novelty Accounts

In the world of computers and IT there are verious types of humor like trolling, memes and plain old analog humor like jokes. But one thing that appeared not too long ago are novelty accounts. These are accounts on websites that are not for a person but more like a task. One famous example is Shitty_Watercolor, a reddit user who posts photos of his drawings on many reddit discussions. And there’s many, many more.

But there’s also accounts which make humor of techies, like Shit HN Says which makes fun of Hacker News (HN). Actually, I have a friend who is a source of all kinds of new odd novelty accounts, like Big Data Borat making fun of databases and (not only) SQL, and PLT (Programming Language Theory) Borat doing basically the same for programming languages. But one of my favorites is PLT Hulk which is non-arguably better than actual Hulk.

Disappointment in Parts

Now, there was no post in quite some time, I’ve been busy cycling through Japan. And yesterday I opened my newly-arrived box with a lot of replacement parts and general bike stuff, because I was annoyed by a number of things at my bike. First of, my bar tape disintegrated in the rain, so I bought a new two-colored fancy looking one, because I am such a superficial person. Also, since I tried a friends bike, I never was happy with the braking power of my own bike, because Giant slapped some cheap Tektro TK-R340 brakes on it. So I couldn’t help myself and got the Shimano BR-5700 (Shimano 105 series brakes, 54€) in black, fitting the coloring of the frame. I was unsure whether the braking will improve, but having replaced them I can confirm that braking does indeed improve and by quite some bit. Also, no idea why Giant builds these on the bikes, as you can get rather decent Shimano R451 for 2x17€. Also, links go to Bike-Components because they ship fast, have low prices, a bearable web site and support payment via PayPal (= not 2 days wasted while transferring money).

Another disappointment are the self-gluing patches for bike tires. I used to have the nifty-looking Lezyne self-gluing patches. Kids, I tell you, these don’t work. At all. Everytime I used these, the tire was filled for two hours and then it was flat, because everytime the air found a way around the patch and left the tire flat. Dammit, the only thing this thing is good for is wasting time. This time I replaced it by an old-skool kit with patches and glue. Seems to work so far.

I’ll be back when I have to rant about more parts. Like the wheels. Heh.

Brain Extensions, or Why Glass Is the Next Step

Some days ago I drowned my smartphone in the rain and was without a smartphone for a couple of days. Once you lack something, you realize how much you have been depending on it. The smartphone is not so much a phone, it at least for me an additional set of senses kinda like sense of balance or hearing. Maybe one of the most prominent features missing was the navigation, my artificial GPS sense has allowed me to find my way on my own in many occasions. Without it, I started staring intently at maps and guessing my position. Also, the lack of instant mail notifications made me hard to reach and the lack of music in my headphones made for some very boring walks. I admit, getting a smartphone was a breakthrough, my friends joked that my hand has joined with the phone in the first couple of months.

Now why? I had most of that already available: a laptop, a mobile gaming console, a music player, a cellphone. The difference was that with a smartphone I always had everything with me, no more thinking about what I might need. And the internet was always just a screen-unlock away, no boot or resume required.

Since I started using computers, there was a number of, might just as well call it paradigm shifts: getting internet in the first place with a 28.8k modem on a pay-per-minute basis, getting a ADSL 1500MB/month “flat rate” and eventually a real flat rate with constant internet access. And then with the smartphone, convenient all-time access to the internet. This sorta turns into a tale of human augmentation, Deus Ex-style.

So the next step is more ubiquitous computing. Wearable computing like the LilyPad is one thing, but what about displaying information. This is where Project Glass enters. For now, it is basically just a camera and somewhat non-remarkable, but it demonstrates quite well what the future could look like. Convenience is a big part in making a technology accessible in our lives. Sure, satellite phones have existed a log time, but cellphones made the technology accessible, camereas were everywhere, but cellphones with cameras have made taking photos of usual, daily things a commodity.

I don’t think Glass itself is that useful and won’t get mainstream usage, just like the Apple Newton didn’t, but consider it a precursor of things to come. As such, Glass is a logical next step from smartphones.